| INDEX | 1300-1599 | 1600s | 1700s | 1800s | 1900s | CROSS-ERA | ETHNO | |
| MISCELLANY | CONTACT | SEARCH | |
As mentioned before, I have lifted the pattern off an original dress, so I had so make some guesses wherever it wouldn't lie flat. E.g. I could measure the length of the sleeve, its circumference at the elbow and the armhole, but I had to extrapolate the shape of the sleeve head and hem, using the grain as a guideline. Pretty tricky. I take my hat off to Janet Arnold.
The original wearer of the dress must have been 154-156 cm tall, with a waist width of 70-72 (that's the dress measurement plus 10 cm for the stomacher). The breast width is more difficult, but I estimate not much over 80 cm: At the lower end of the armscye, the dress is c. 68 cm wide; an upper opening of more than 20-22 cm would seem badly proportioned. The wearer must have had a small ribcage and small breasts. Maybe she wasn't quite adult yet.
The pattern does not include seam allowances. One exception is the upper back armscye, where the model has an unusually wide allowance. This is reflected in the pattern for the shoulder piece and front top fabric. The horizontal/vertical of each diagram corresponds to the straight of grain.
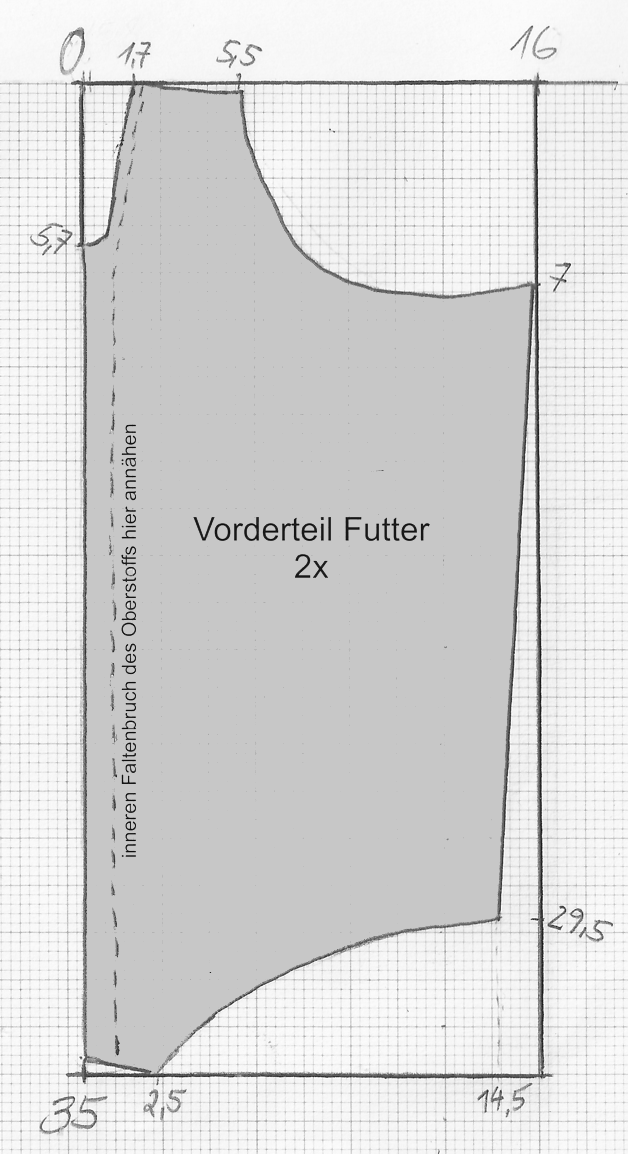
Front edge on straight of grain. I have no idea why it is cut back at the top. There seem to be no technical reason for it. The caption along the dashed line says: attach the inner fold of the top fabric here. (The larger captions in each diagram just say "front lining, cut twice" or similar.)
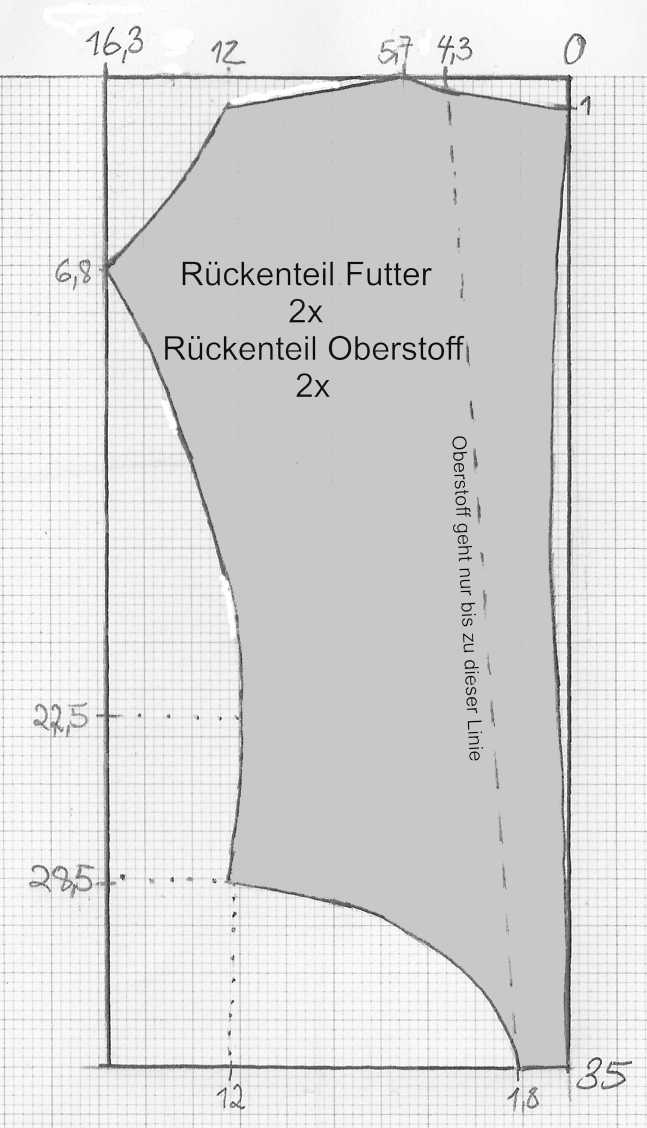
Back lining and side back of top fabric
The top fabric is cut from the side to the dashed line (which is what the caption says). The raw edge of the top fabric will be covered by the centre front part.
The part that is not filled with grey is what, for whant of a better word, I shall call seam allowance.
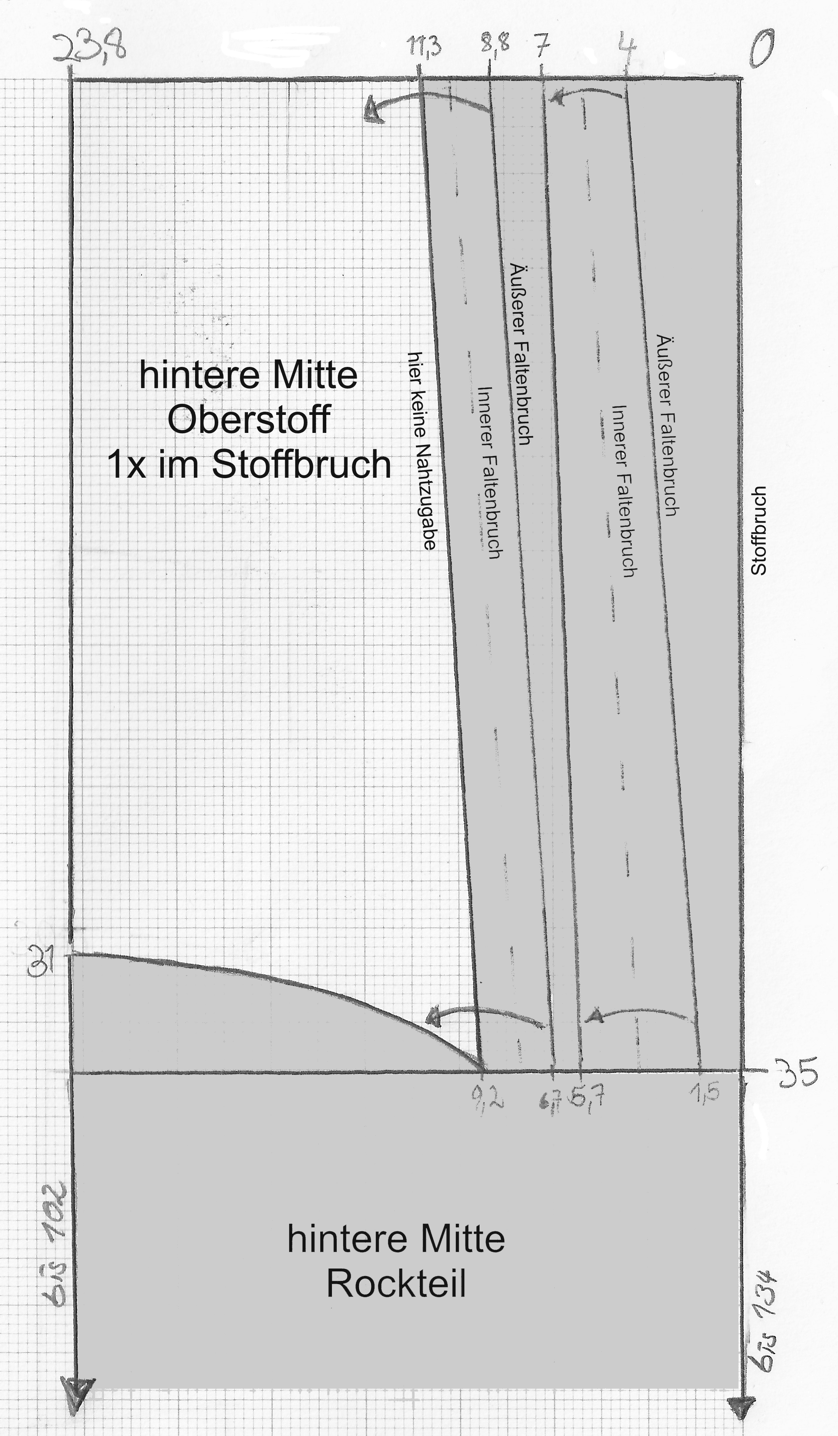
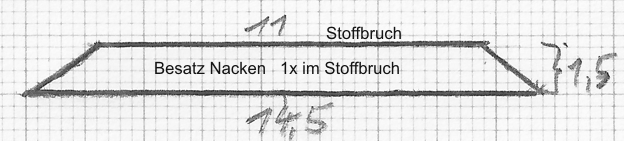
At the arrow mark, extend pattern up to the given length. The CB is 134 cm all in all. Captions, from right to left: fold, outer fold line, inner fold line (repeat), no seam allowance here. You can cut this on the fold if your fabric width allows. The model has a CB seam.
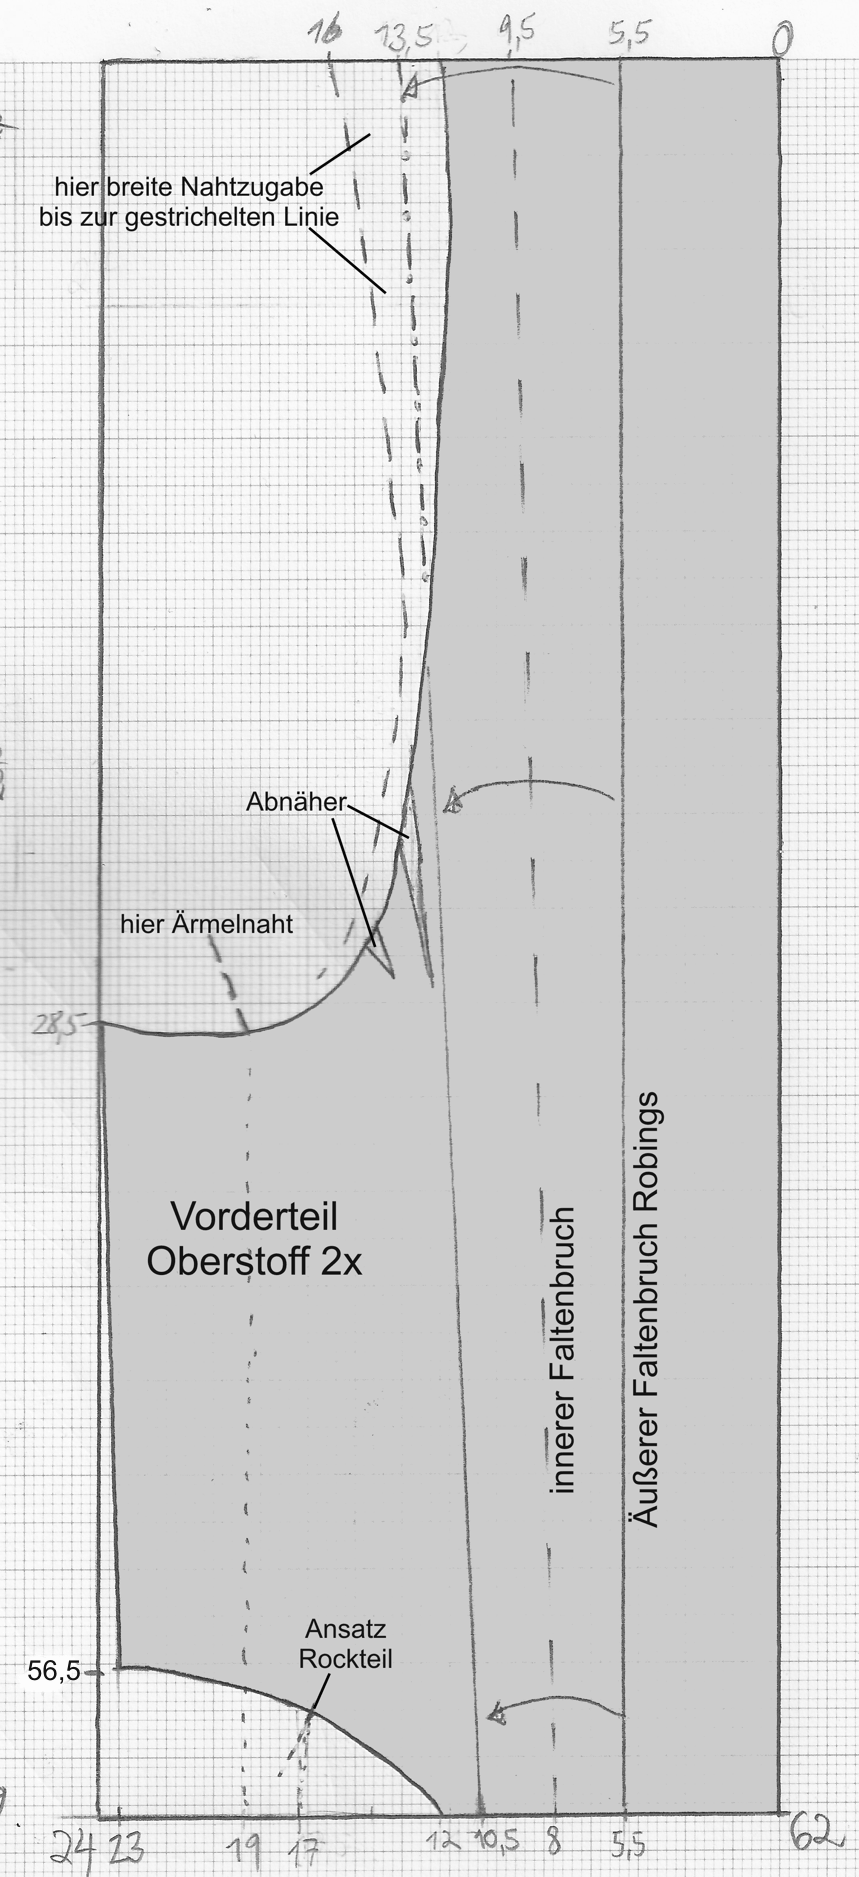
Here, too, is a wide allowance at the armhole. Take care not to mix up the dashed edne of the allowance with the dash-dot-line which reflects the placement of the outer fold line of the robings. The through line which encloses the grey filling reflects the seam where the sleeve is attached. Obviously the sleeve fold overlaps and hides that seam. Captions, from right to left: Outer fold line robings, inner fold line. "Abnäher" means darts. At the waist line: Attach skirt here. The rest explain about the allowance and sleeve seam.
Both top fabric and lining. Left faces back, right faces front. Circle at lower left represents the lead disc.
Cut on fold in top fabric only, narrow allowances. Top edge (the shorter one) is the fold.
Top fabric, lining optional. The captions say "width" followed by the width of each piece. The fact that the seams appear slightly slanted must be an artifact of the scanning. The right-most part is the centre back part which I have already given above - do not cut it again! I have just included it here so that you may see the skirt in its entirety and how the CB part connects to the rest.
For the petticoat, see Skirts of the 18th century.
Next step: The lining
Content, layout and images of this page
and any sub-page of the domains marquise.de, contouche.de,
lumieres.de, manteau.de and costumebase.org are copyright (c) 1997-2022 by Alexa Bender. All rights
reserved. See Copyright Page.

GDPO


This work is licensed under a Creative Commons License.