| INDEX | 1300-1599 | 1600s | 1700s | 1800s | 1900s | CROSS-ERA | ETHNO | |
| MISCELLANY | CONTACT | SEARCH | |
As with the lining, the parts of the top fabric are not connected using the usual backstich seams. The allowance of part B was folded under, put on top of part A and top-stitched. The top edge of the skirt is sandwiched between lining and top fabric, and since the top fabric is sewn onto the lining in places, the skirt must have been basted or sewn to the lining before the fashion fabric of the bodice was mounted.
Sew a backstitch seam along the CB of the back panel, 1.5 cm away from the fold at the top and 1.0 cm at the bottom end of the bodice, which is about 40 cm below the top edge. Iron the pleat open. Fold the back bodice pleats as in the pattern, baste and iron.
|
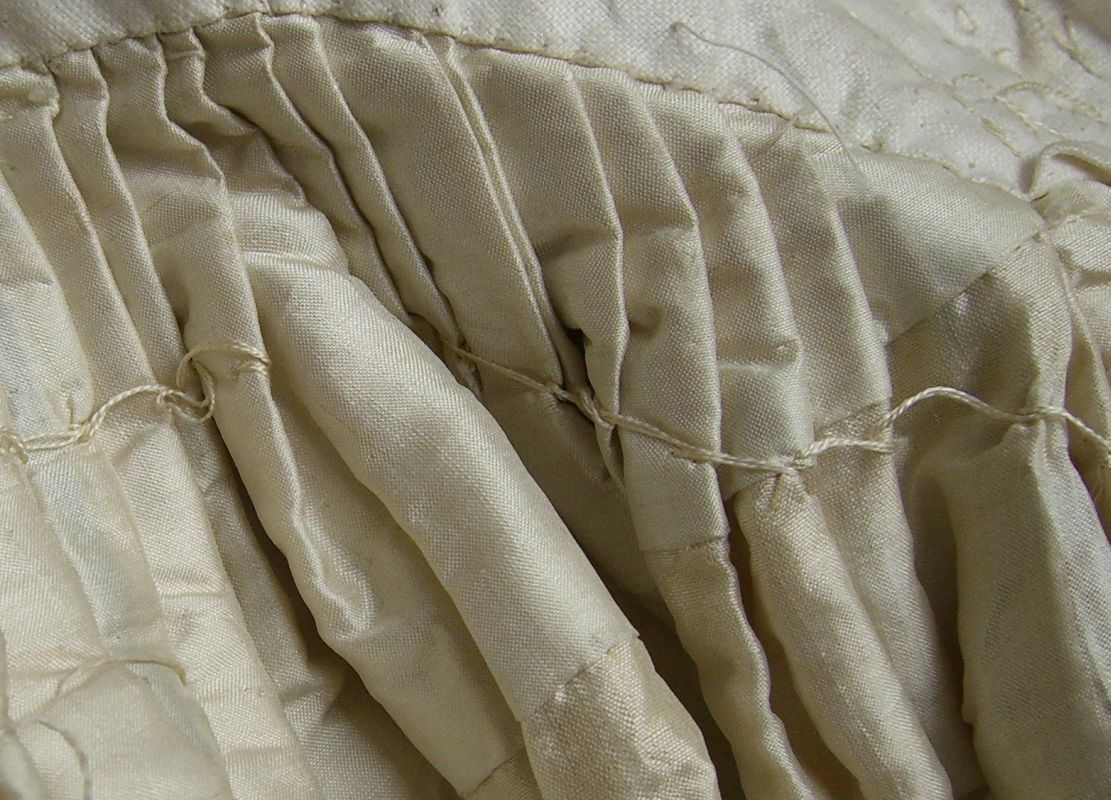
Connect up the skirt panels and attach them to the CB panel. If the skirt is going to be lined, baste the lining to the skirt panels now because it will be pleated in one with the top fabric. In the model, the skirt pleats are 10 mm deep and overlap 5 mm, with a deviance of < 1 mm. Seen from the inside, the pleats are not quite as regular. Fold the pleats to lie parallel for 4-5 cm from the top, outer folds facing back. Baste them along the top and again about 3 cm below. In the pic you can see how the lower basting thread is wrapped around each inner fold, preventing the pleats from opening right from the top. |
 |
|
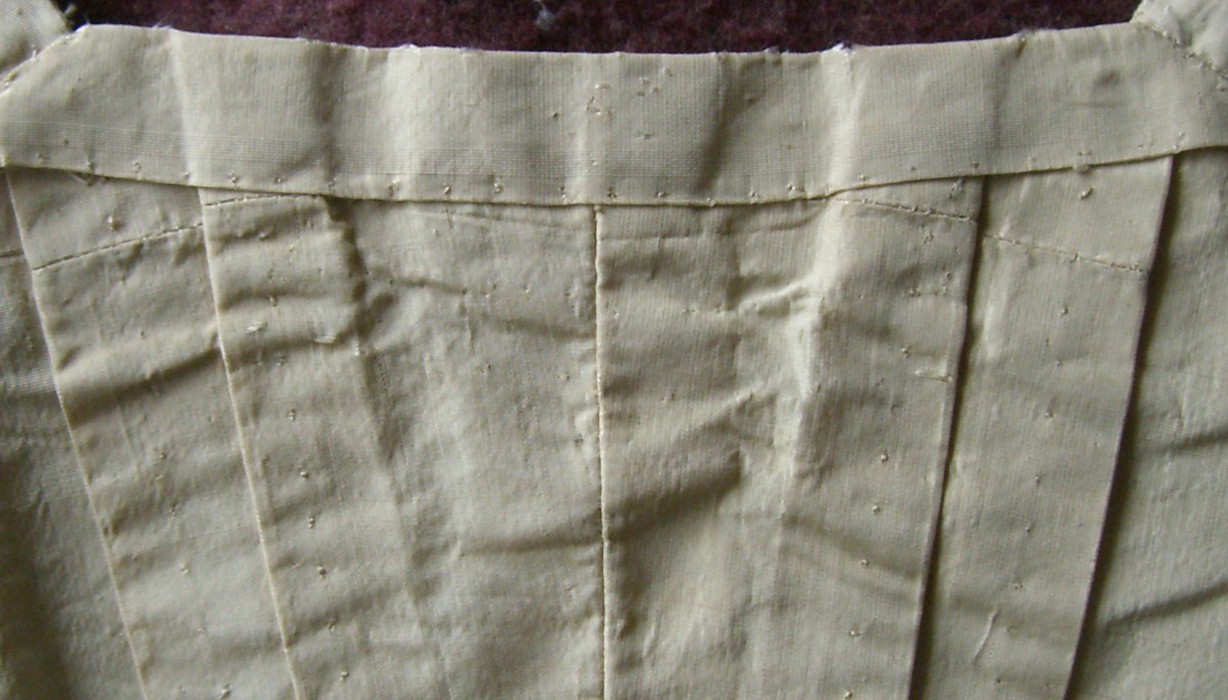
Seen from the outside, it looks as if the pocket slit sat about 2 cm behind the bodice side seam, but really it sits right below the side seam. The optical illusion is achieved thusly: In the back skirt panel, stop pleating 2.5 cm before the pocket slit edge. In the next skirt panel, start pleating 2.5 cm from the pocket slit edge. Fold under 2.0 cm out of those 2.5 cm. Put that onto the back panel with an overlap of 2 cm. Seen from the outside, it looks like an unbroken line of regular pleats. the pocket slit is hidden in that 2 cm overlap. In the pic I have pulle open the slit so as to reveal the overlap. To the left, a seeming three pleats away from the slit, the bodice side seam. Back panel above, front panel below. |
 |
Baste the CB of the back bodice to the CB of the lining and the skirt pleats to the lower edge of the bodice lining, with the allowances in the lining folded under.
Now the top fabric is mounted, starting with the side back. Place the lining flat onto a surface. Match up the side seam of the lining and top fabric and pin. Ideally, the armhole and lower edge also match. If not, the allowances will hopefully take care of it. Smooth top fabric towards CB, pin there and along armscye and lower edge. Baste backwards-facing edge of top fabric to lining. Also baste along shoulder seam. Fold under allowance of lower bodice edge and top-stitch onto skirt.
|
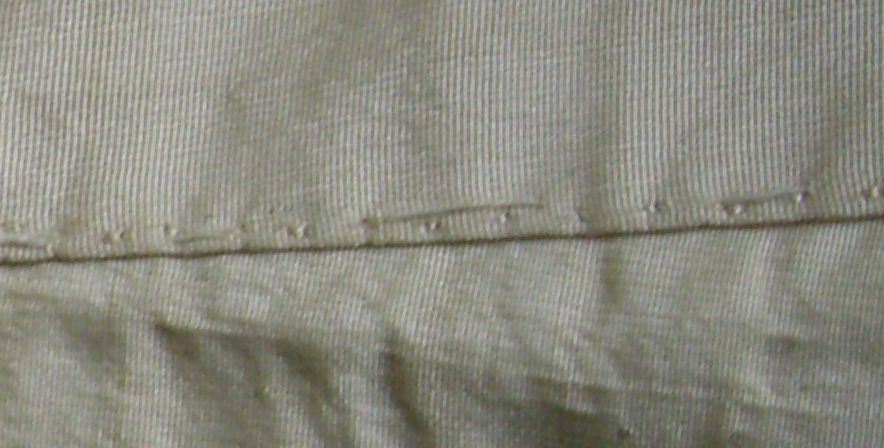
Now smooth the pleated CB part onto the lining. Sew once along the CB and then, you would expect, nicely hidden under the back pleats. Nope! If you look closely to the pic here you'll see pinpoints of thread running parallel to the pleat folds. Those are the top-stitched seams which hold down the pleats. The seams of the outer pleat also secures the raw edge of the side back which is hidden under it. |
 |
|
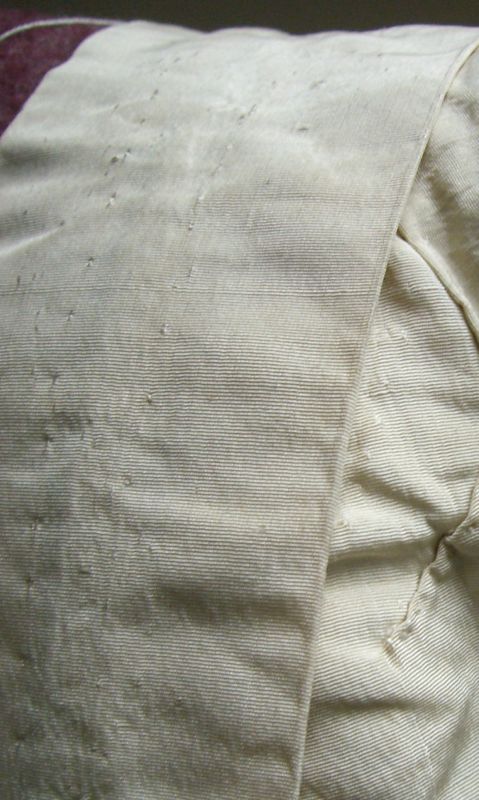
Now the front. As mentioned on the pervious page, armhole and side seam are the only places where top fabric and lining are the same. So this is where we start matching them up. Baste from the connecting seam of the lining shoulder strap, around the lower armscye and down the side seam - with the side seam allowance, can you guess it? folded under. Top-stitch the side seam about 1 mm away from the edge. In the pic you can see the basting thread which the seamstress appears to have forgotten to remove. These long running stitches do not exist in the other side seam. If your front needs darts, sew them now. |
 |
|
For the next step, the dress should be put onto a dummy. Not strictly necessary, but easier. Smooth the top fabric from the side seam towards the front. Pin 1-2 cm from the front edge of the lining. Fold the robings as in the pattern and fold the front edge allowance under. Baste. The robings, too, are top-stitched in place. The other row of stitching you see in the pic, the one closer to the front edge, attaches the top fabric to the lining edge. As the allowance along the front edg of the fashion fabric is relatively wide, it sohuld be easy to catch it while top-stitching the lining and top together. Stop where the lining pattern is cut away. |
 |
|
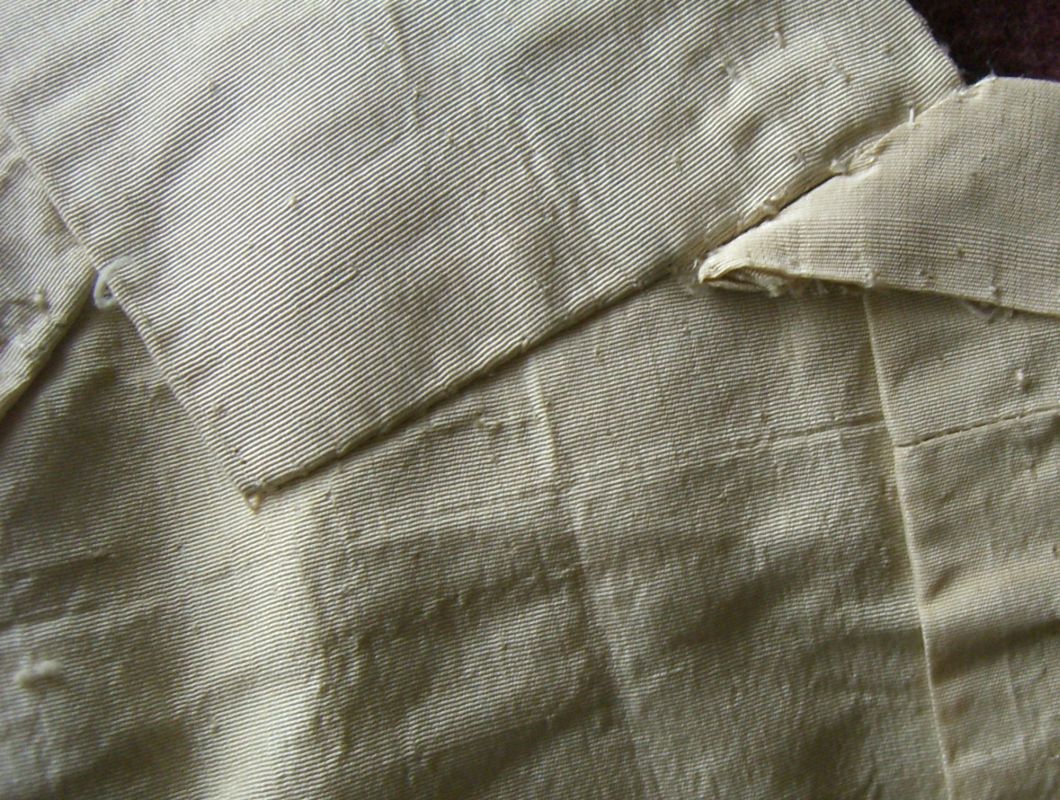
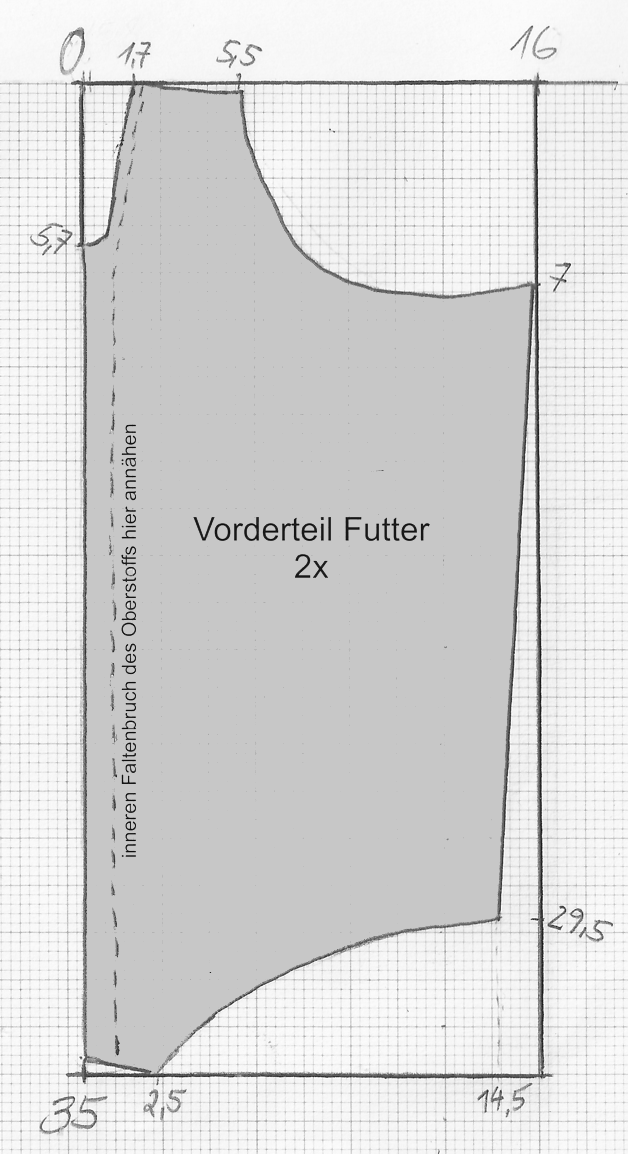
The front edge continues straight past this point. The top fabric, however, hast to be slightly longer than the lining as it cirves around the shoulder, like the outer lane of a racetrack. This is where a dummy really becomes important. We've seen this pic before: The seam between shoulder strap ands back of the lining. To the right you see how the top fabric protrudes the lining because of the lining being cut away there (the 5,7 point in the pattern). Right along the lining edge you can just see the inner fold of the robings peek out. |
 |
|
While the dress is on the dummy, determine the shoulder seam where the front of hte bodice meets the back. Fold the allowance of the front under, clip away any excess if necessary, and whip-stitch to the back. Fold under the edge of the bodice front and top-stitch to the skirt and lining. Using the width of the back neckline as guidance, cut the neck facing so that the short, diagonal sides can lie right along the shoulder seam, as seen in the pic here. The allowances are folded under first, then whip and/or top stitched to the outside of the back. The fabric fold lies right along the edge. Note that the inner half of the facing lies under the lining. In the next-to-last pic you can just about see that in the lower right corner. |
 |
Next step: The sleeve
Content, layout and images of this page
and any sub-page of the domains marquise.de, contouche.de,
lumieres.de, manteau.de and costumebase.org are copyright (c) 1997-2022 by Alexa Bender. All rights
reserved. See Copyright Page.

GDPO


This work is licensed under a Creative Commons License.