| INDEX | 1300-1599 | 1600s | 1700s | 1800s | 1900s | CROSS-ERA | ETHNO | |
| MISCELLANY | CONTACT | SEARCH | |
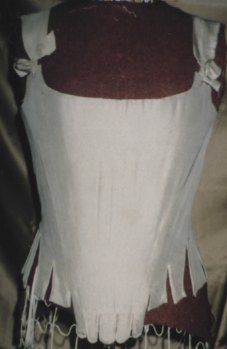
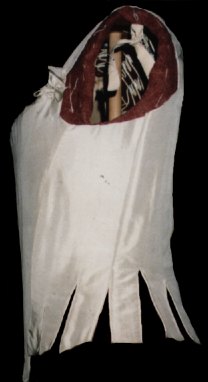
Stage 1, worn once only: from behind, from the side, from the front
The pattern is based on a 1680s pair of stays from Nora Waugh's Corsets and Crinolines, p. 38. The foundation fabric is my usual cheap, strong cotton courtain fabric (IKEA), covered in fine golden silk taffeta. The boning consists of 1x10 mm plastic boning from Wissner being sandwiched between two layers of the foundation fabric, hand-stitched in place. The lacing holes are done in buttonhole silk.
In the pattern, the straps sit low on the shoulder in a way that was worn only for court dress at the time; for everyday wear, the straps were already sitting high on the shoulder. As I had intended the corset for a 1685 manteau (i.e. négligé and therefore very informal), I adjusted the shoulder straps to a higher position. I also decided against full as opposed to half boning, partly because of laziness but mainly because the 10mm wide bones don't lend themselves as easily to full boning as period 2-4mm boning did.
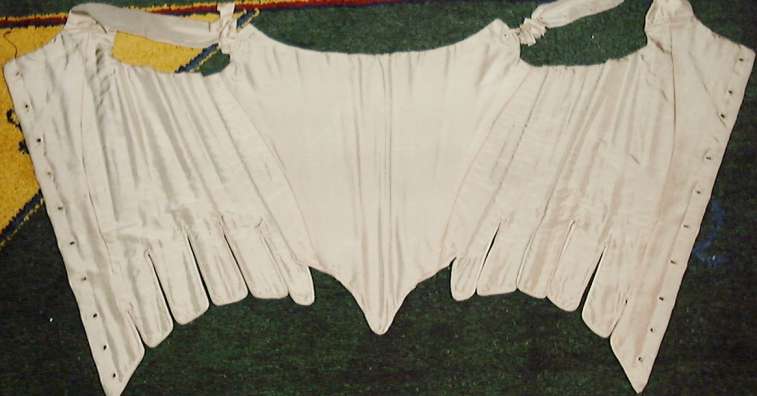
I also had to resize the thing somewhat. My usual routine is to add most of the additional width in the centre front and (not quite as much) back as that is where I deviate from the standard figure most. The front panel, therefore, got additional tabs (5 instead of 3). Following another of my routines, I let the boning go through into the tabs wherever possible: I had once tried a 16th century corset and found that if the boning stopped at the waistline as it was done then, the edge would cut into the flesh at the waist. Shoving the boning through past the waist takes the pressure away.
Now when I first tried the corset in earnest, I found that the additional front tabs, being boned, were in the way if I sat down - I should have known. The inner 3 would go between the thighs, but not the additional ones. What I did was to cut the front tabs away save for the centre one. That was another mistake: I could have left all or the the inner three in place, only removing the surplus length of boning. This brought the corset to stage 2....
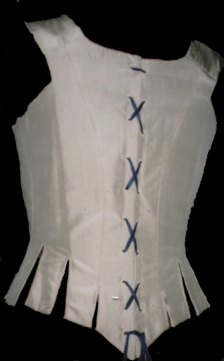
Stage 2:
Here the front tabs have been removed. They might have played a role if the corset was worn without a covering stomacher, but that was never an option, so forget it. Due to some oversight, or just too much caution, the corset was also too wide. There should be a gap where it laces, but in this case if I laced properly, the edges would have had to overlap. Some of that error may be due to the lack of a maid when trying it on... So I added two darts on each side to remove the surplus width, distorting the original pattern even more.
However, the resulting corset still gives the proper shape and fits. Contrary to my original fears I didn't even feel the surplus fabric in the darts. I have worn it for a day - at the end of it, it started to dig into the back of the waist. When I examined the corset afterwards, I identified the cause as two bones in back which had given. They were the only two bones that had to support a tab (and a relatively wide one at that) all alone. (All the other tabs have two bones in them or are very narrow.) I have now turned the two bones upside down to relieve the stressed region, and put a strip of steel boning besides each. I am confident that from now on, the corset will fit without giving me any trouble even after hours of wearing. Another point that needs attention is the lacing holes which I will strengthen with another layer of buttonhole stitches.
At last, I have neatened the lower edge tabs with bias tape cut from the top fabric.
What I have learned from this is...
Content, layout and images of this page
and any sub-page of the domains marquise.de, contouche.de,
lumieres.de, manteau.de and costumebase.org are copyright (c) 1997-2022 by Alexa Bender. All rights
reserved. See Copyright Page.

GDPO


This work is licensed under a Creative Commons License.